14 May 2020
How to use the guidewire for simple and efficient pacing during TAVI
Cardiac pacing during prosthesis deployment is a critical step to improve deployment accuracy and safety. Discover the tips and solutions proposed by Didier Tchétché and Saif Siddiqui.
Frequency of the problem:
Expert level:
Summary
As TAVI indications expand, the risk profile of the average TAVI patient continues to change. Patients are relatively younger and healthier, and more complex valvular morphologies are under investigation for treatment targets. With these changes, the technique for TAVI continues to undergo refinement to reduce periprocedural risk and to become further streamlined. Cardiac pacing during prosthesis deployment is a critical step to improve deployment accuracy and safety.
There are various strategies to perform cardiac pacing including pacing over the wire, an active fixation temporary pacing lead, or the conventional balloon-tipped ‘unfixed’ pacing lead. Of these approaches, pacing over the wire is an efficient, simple, and effective technique that improves the procedure for the operator and reduces the risk to the patient. It can be efficiently used with any kind of TAVI device. Patients at higher risk of complete atrio-ventricular block should get a temporary pacing lead.
The problem
When selecting a strategy for cardiac pacing, considerations include the risk of tamponade/infection, cost, reliability of pacing, and procedural efficiency (material use and procedure time). The ideal strategy will mitigate the former two while augmenting the latter two. This will be especially relevant in an era of TAVI when a greater number of lower risk, younger patients will be candidates. For these reasons, cardiac pacing over the wire should be considered as an important strategy for TAVI. Any effort to make TAVI economically efficient (without compromising efficacy) will have macroeconomic benefits as the procedure becomes more common.
Principal idea
Cardiac pacing over the guidewire takes advantage of the apposition of the LV wire against the endocardium and the electroconductive properties of the stiff wire. The pulse generator is attached to the LV guidewire to transmit an artificial electrical stimulus to pace the heart at a chosen rate. The guidewire is pre-shaped to be atraumatic, and using a guidewire for pacing obviates the need for additional venous access which reduces the risk of complications and improves procedural and cost efficiency. The strategy described here is simple which streamlines the procedure and makes it widely applicable.
Material needed
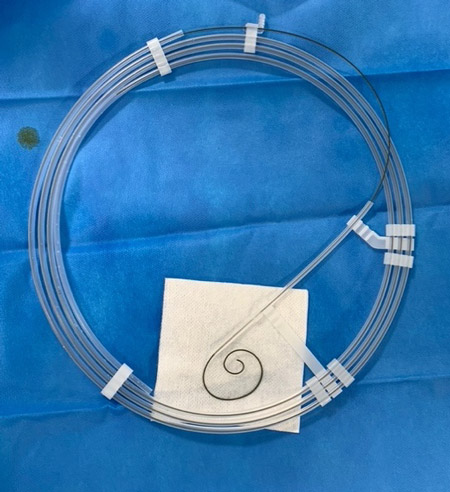
Preshaped LV guidewire (e.g. Safari™ guidewire by Boston Scientific, Confida™ by Medtronic).
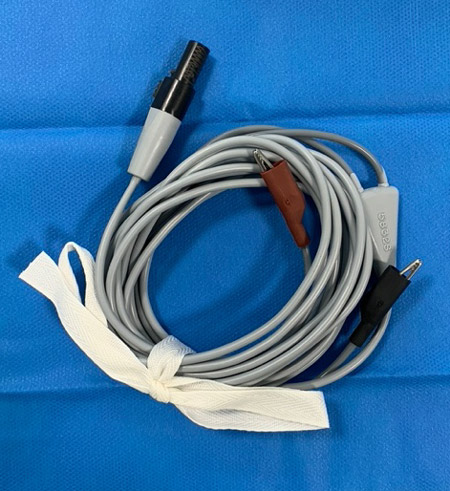
Alligator clips (sterile) to connect pulse generator to guidewire and patient.
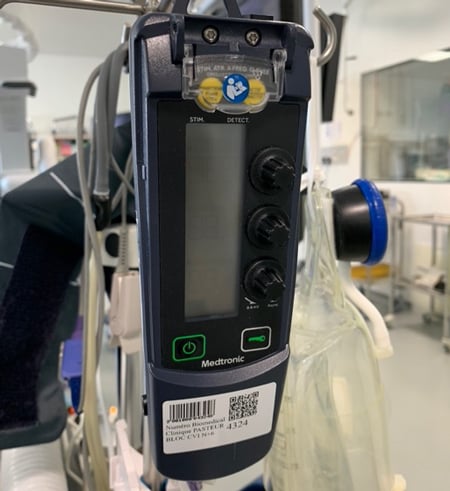
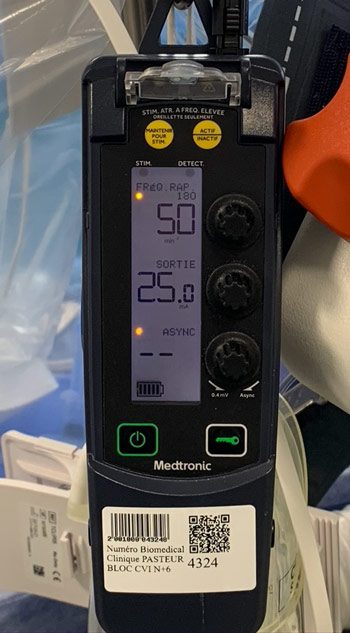
Pulse generator delivering high energy ouput.
Optional (but recommended):
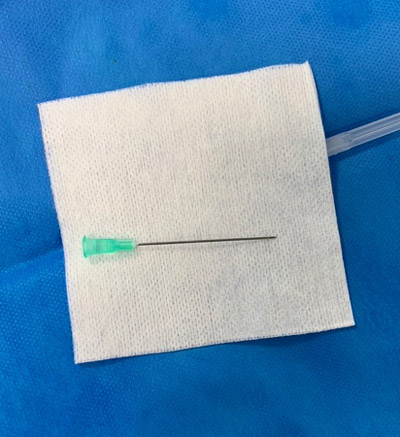
- Fine gauge needle (e.g. 21 gauge) of adequate length (e.g. 4 cm/1.5 in) to facilitate attachment of grounding electrode to patient

Fine gauge needle (e.g. 21 gauge) of adequate length (e.g. 4 cm/1.5 in)
- Tegaderm dressing to secure grounding electrode attachement to patient
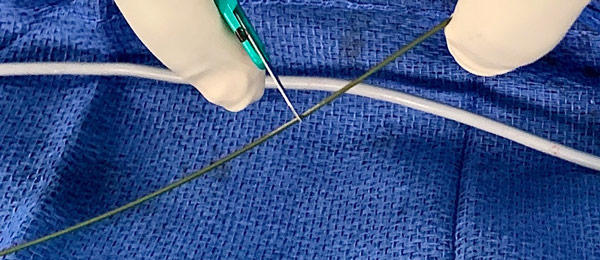
- Scalpel to scrape and expose metal of guidewire
Method step-by-step
Step 1: Attach electrode to patient
Both ends of the alligator clips can be used. There are two ways this can be performed.
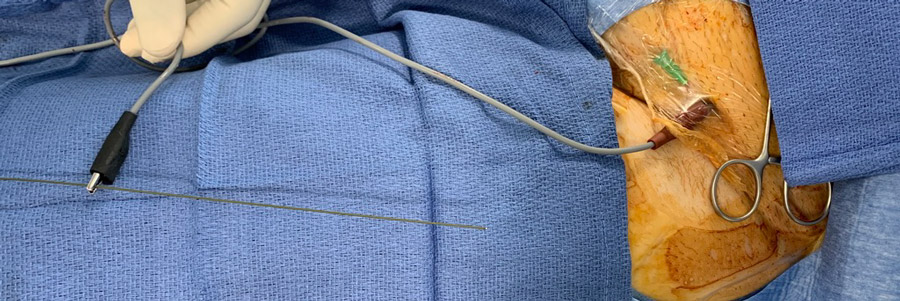
The first is by inserting a fine gauge needle of adequate length into the subcutaneous tissue in the manner shown below and attaching one of the alligator clips to it. If done this way, this can be done at any time from prior to vascular access to just before prosthesis deployment. A tegaderm can be applied to further secure the electrode. The tip of the needle should be secured below the skin of the patient.


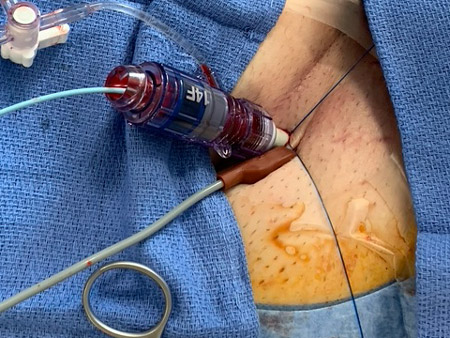
The second method is by attaching the alligator clip directly to the patient at the entry site of the delivery catheter (as shown below). If done this way, the clip should be secured after insertion of prosthesis delivery sheath.

Alligator clip attached directly to the patient at the entry site of the delivery catheter
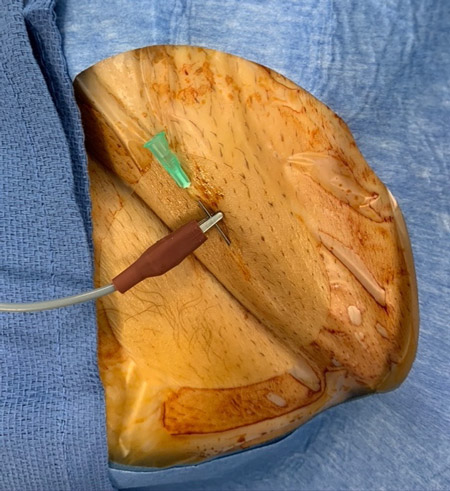
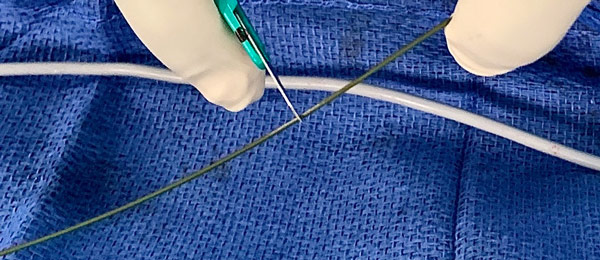
Step 2: Attach electrode to wire
After valve prosthesis has been loaded onto the wire and positioned across the annulus, the distal end of the LV guidewire should be positioned and connected to the remaining alligator clip as shown below.
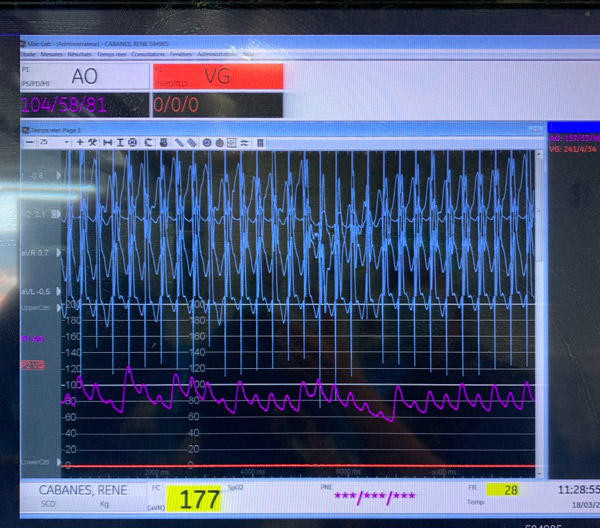
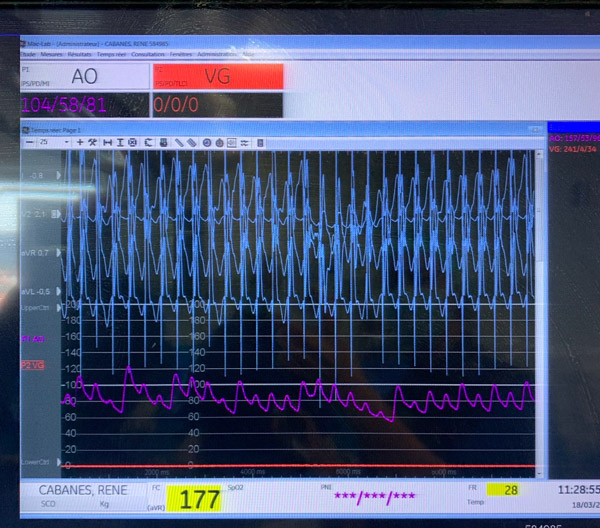
Step 3: Confirm stability of system
Non-sterile personnel will attach electrodes to pulse generator at desired output level and rate (highest output recommended) to test pacing response.

Points of specific attention
Pacing through the LV wire can only be tested or executed with an insulator protecting the guidewire: diagnostic or guiding catheter, balloon catheter or TAVI delivery catheter.
If the electrode attached to the patient is secured directly to the patient, it should be done in such a fashion where it grabs the subcutaneous tissue at the superior rim of the catheter entry site.
In the case that reliable pacing is not achieved:
- Check the electrode attached to the patient to make sure it grasps adequate tissue or it can be attached via a needle as shown above.
- Scrape a portion of the wire with a scalpel to better expose the metal core and the electrode can be attached here.
- Gently advance the LV guidewire to apex to maximize wire apposition against the endocardium (although pacing can also be achieved with the wire in the mid cavity and in the LVOT).
In the case a conduction block develops, cardiac pacing can be continued with the guidewire in position while venous access is obtained and an indwelling temporary catheter is advanced and positioned in the RV. The key trick is to keep the LV guidewire protected by an outer catheter in order to enable efficient pacing while positioning the RV lead.
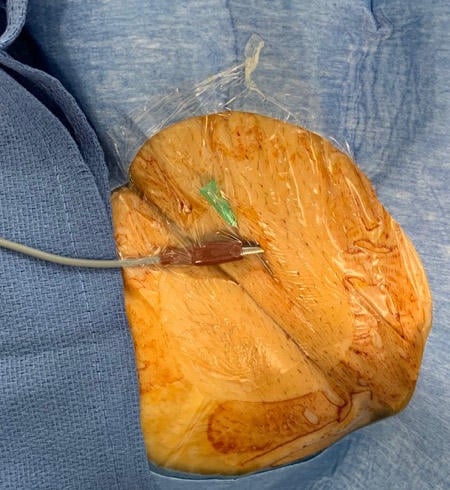
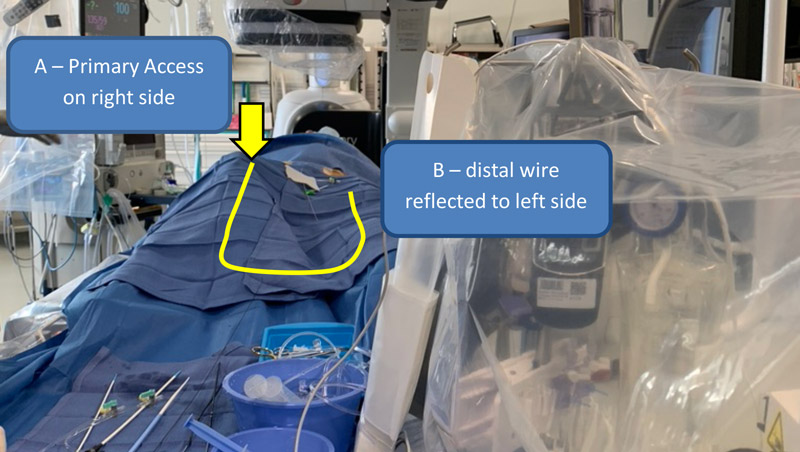
For efficient, clean surgical field layout, if you use non-peelable/extendable alligator clips, we recommend reflecting distal end of the LV guidewire (the end attached to the electrode) to the side opposite from the primary access side.
For example, if right femoral arterial access is used, the distal end of the LV guidewire can be reflected towards the left groin (see figure).

A word from the reviewer - Alexander Wolf
Great Illustration of how to use LV wire pacing. In order to streamline TAVI procedures this technique is a valvuable asset. Very helpful for a patient tailored pacing strategy especially in patients with a low risk of conduction disturbances.

Authors


1 comment
Dear Didier, excellent and didactic Material to explaind crearly how to use this technique, i have a question about if you recommend different Tips and Tricks in the case of implant Self Expandable (Evolut/Acurate) or Balloon Expandable (S3/Myval) Valves, thanks a lot. Diego Rodriguez