28 May 2020
How to treat ostial lesions with Szabo’s technique?
Szabo’s technique, also known as “tail-wire” technique, is one of the few specific ostial intervention techniques that can be helpful to achieve precise coverage of the ostium without excessive protrusion into the aorta or the respective main vessel... Discover the tips and solutions proposed by Felix Damas de los Santos!
Frequency of the problem:
Expert level:
Summary
The treatment of ostial lesions is associated with lower procedural success rates, higher complications rates and a greater likelihood of restenosis. This is attributed to the location and morphology of these lesions which are often rigid and heavily calcified. The precise stent placement can be challenging with some cases ending up in geographic loss or second stent placement. Without applying the proper technique, there is also a higher risk for complications such as dissections or stent malapposition.
Szabo’s technique, also known as “tail-wire” technique, is one of the few specific ostial intervention techniques that can be helpful to achieve precise coverage of the ostium without excessive protrusion into the aorta or the respective main vessel. Its proper performance and correct patient selection are essential to achieve satisfying results.
The problem
Ostial lesions (within 3 mm from the origin of a coronary vessel) can be subdivided into aorto-ostial and non-aorto-ostial lesions. They are frequently found to be fibrotic and calcified. The correct treatment requires precise handling of interventional tools and an accurate stent positioning and delivery. Full coverage of the ostium without unnecessary protrusion into the aorta or main vessel is the main goal.
There are several difficulties you are facing in this type of lesion. For aorto-ostial lesions, the guide catheter needs to be disengaged frequently. This may lead to poor vessel visualization. Furthermore, stent deployment may be complicated by excessive stent movement due to in/-and expiration or systolic contraction. Foremost, for exact positioning, it is critical to be aware of the precise stent-properties concerning the localization of the radio-opaque marker in relation to the stent. In aorto-ostial lesions, post stent deployment “Flaring” at the ostium may help to achieve full stent apposition.
Principal idea
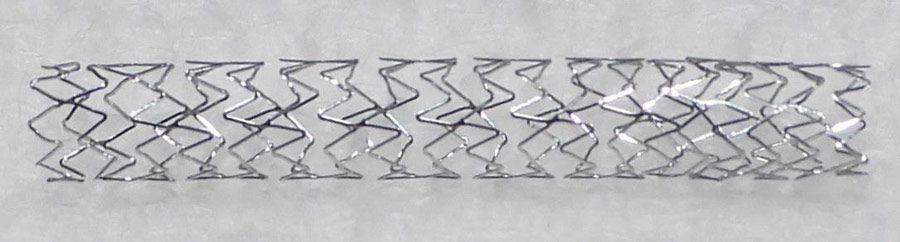
Szabo et al. described a technique primarily for aorto-ostial lesions, but can also be applied to non-aorto-ostial lesions. The name tail wire arises from the need of placing a “stop wire” across the last strut of the stent, which will facilitate holding the proximal part of the stent right at the exact ostium of the vessel allowing an accurate ostium coverage without excessive stent protrusion.
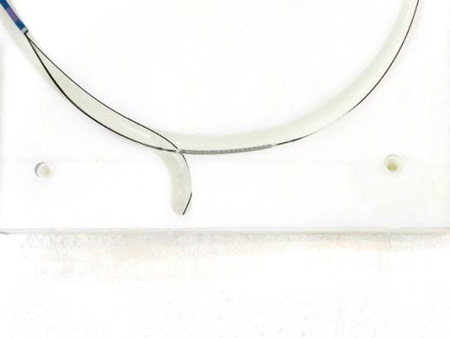
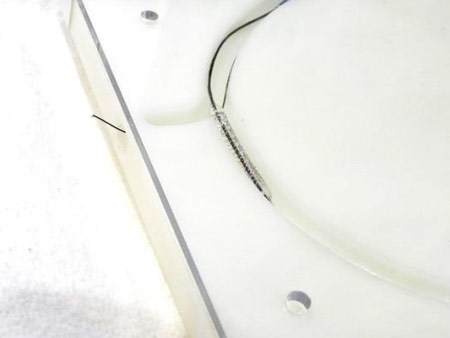
Material needed
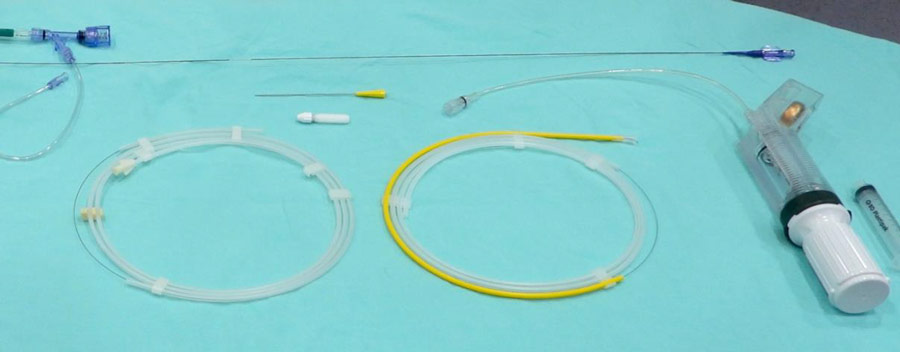
The needed equipement is available at any cardiac catheterization site. It is shown in this image. Your tool kit consists of two coronary wires, one inflator, one drug-eluting stent and a guide catheter with your hemostatic valve of choice.
Method step-by-step
Step 1: Placing your coronary wires
As any other coronary angioplasty, put your guide catheter in place and advance you coronary wires
Step 1-a: One coronary wire into the ostially diseased vessel
Step 1-b: And the other one into its side branch (or freely into the aorta for aorto-ostial lesions).
Step 2: Opening the proximal strut
This is actually where Szabo’s technique begins.
Step 2-a: First, remove the stent cover uncovering only the proximal strut.
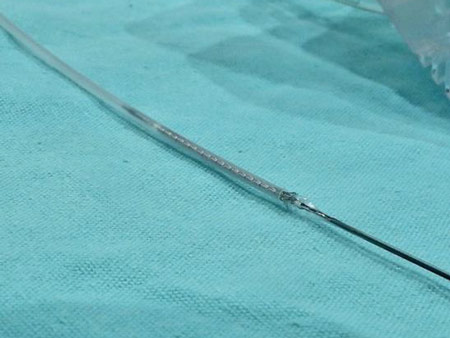
Step 2-b: Now, inflate the stent at 2 atmospheres in order to slightly and partially open (Video Step 2) only the proximal stent strut.
Step 3: Setting the “tail wire”
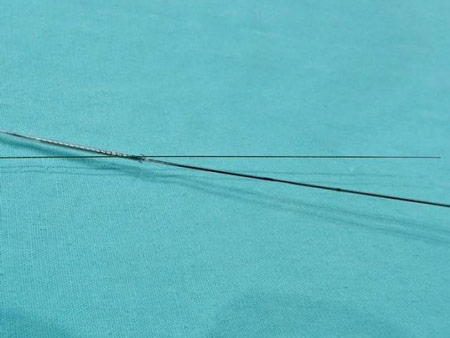
Step 3-a: Gently and carefully (avoiding damaging the stent balloon) cross the opened cell with the distal part of the coronary wire (left) placed in the side branch or in the aorta (not the wire that crosses the ostial lesion) (Video Step 3).
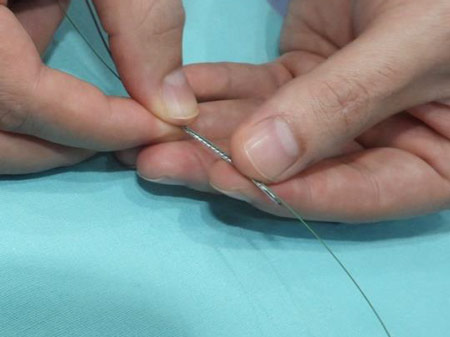
Step 3-b: Crimp back (manually) the proximal strut and mount the stent over the other coronary wire (the one that crosses the ostial lesion that you want to treat).
Step 4: Stent placing and delivery
Step 4-a: Gently advance the stent up to the ostial lesion. While doing this, the stent will be stopped by the “tail-wire” right at the ostium of the target vessel (Video Step 4-a).
Step 4-b: After careful selection of the stent position, implant the stent in the usual manner (Video Step 4-b) and finally remove the tail wire from the side branch (or the aorta).
Points of specific attention
Apply this technique only for aorto-ostial or ostial lesions with angles between > 60 but < 90 degrees. Be aware of tortuosity. Both factors have been described to be related to stent migration.
Prepare the lesion adequately. Predilation preferably with an NC balloon (cutting balloon or rotablation as needed).
Be careful and meticulous in the tail wire preparation to maintain the stent structure and avoid the risk of stent migration during the procedure.
Following these steps in well-selected patients, this technique will allow you to achieve good results with complete ostium coverage minimizing the risk of complications and stent malapposition.
Reviewed by Alexander Völz
Authors


8 comments
Very nice step by step description! Thanks for sharing!
Is there clinical evidence of the benefit of this technique?
Great illustration of the technique! Thanx for sharing Most important step is minimum inflation of proximal stent struts for tail wiring.
It appears in the video 4-b, that the inner curve of the ostium stays uncovered. Is that a problem when using this technique?
should we pushing the stent slightly into the target vessel or only stop pushing stent whenever we feel resistance from the tail wire?
In step 2b, I sometimes find that 2atm is not adequate to inflate the proximal part of the stent. I have to inflate the inflator up to 6atm. In step 3, why don't we insert the wire into the proximal strut from the proximal wire, instead of the distal part to avoid damaging the stent balloon?
Do all stent balloon inflate form the edges?? There are stent platform where the balloon in the stent forst dilates on the center ??
Great effert. I hve done it 2 times with same steps one for Diagonal brnach and other for ostial RCA both failed. In both stent was protude almost 5 mm feom ostium. That RCA stent whem i push to much dislodged nd longitudinal distruction of stent. So didnt find it realy helpful honestly