I need a shorter guiding catheter and I don’t have it in my cath-lab!
A problem-solving step by step tutorial
The guiding catheter is necessary for guaranteeing the support and deliverability of additional devices. However, it's not always of the perfect length for several reasons, because it is not available at that moment in the cath-lab or it is not designed for the purpose you need. By using the technique described by the authors, it is possible to modify a guiding catheter to the desired length.
Frequency of the problem:
Expert level:
Summary
The need for a short guiding catheter is a real-world necessity in several possible situations. Two examples are the use of a device shorter than our guiding catheter (GC), such as a bioptome or a forceps, and the need to externalize the microcatheter and the retrograde wire during a CTO retrograde approach through an epicardial collateral channel or a venous bypass graft as well.
The problem
The technique for achieving a shorter catheter is simple and effective, and it allows you to shorten the GC by how much you require to reach the length needed. Of course, you cannot restore a longer GC once you cut off the overstock length. So, it is essential to estimate the length in excess properly.
Principal idea
The GC is necessary for guaranteeing the support and deliverability of additional devices. According to the supplementary device used and its work, you need a longer or shorter part of it outside the GC. The GC is not always of the perfect length for several reasons, because it is not available at that moment in the cath-lab or it is not designed for the purpose you need. But, using the technique we are going to describe, it is possible to achieve the desired length for a shorter GC.
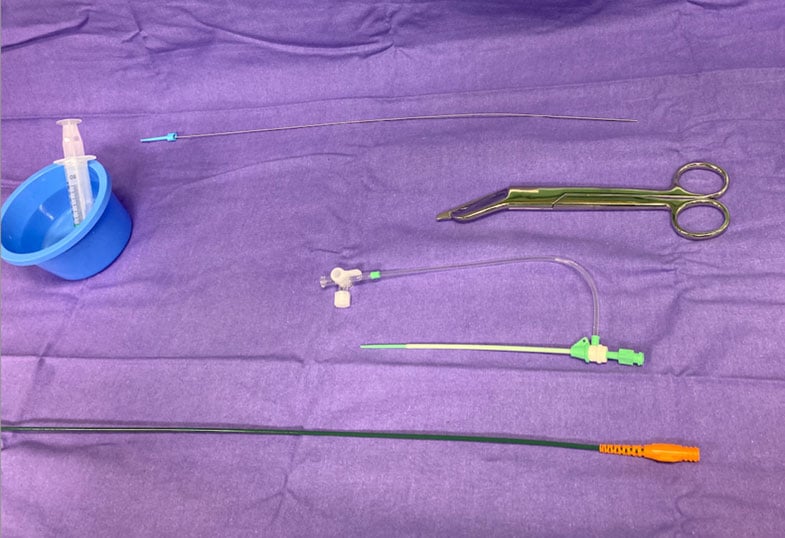
Material needed
- Sterile scissors
- A femoral sheat of 1 French smaller of the GC you want to shorten
Method step-by-step
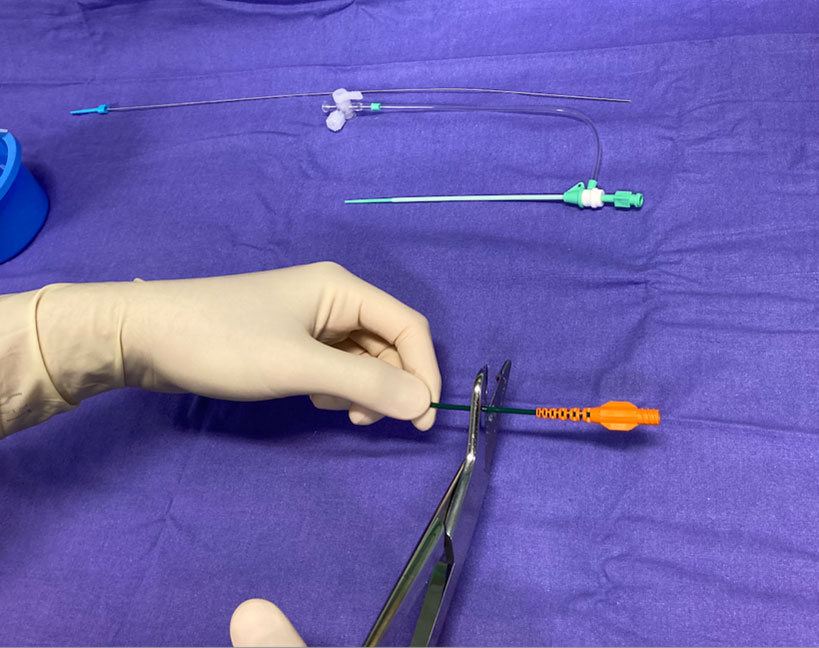
Step 1
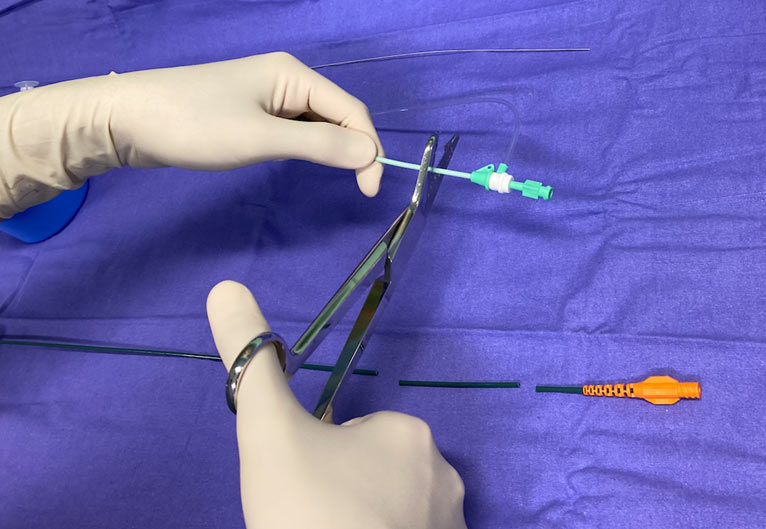
After a proper evaluation of the length you desire to shorten your GC, you cut the GC around 2 cm starting from the proximal part using sterile scissors.
Step 2
Then you cut off the length in excess for achieving the perfect catheter for your purpose.
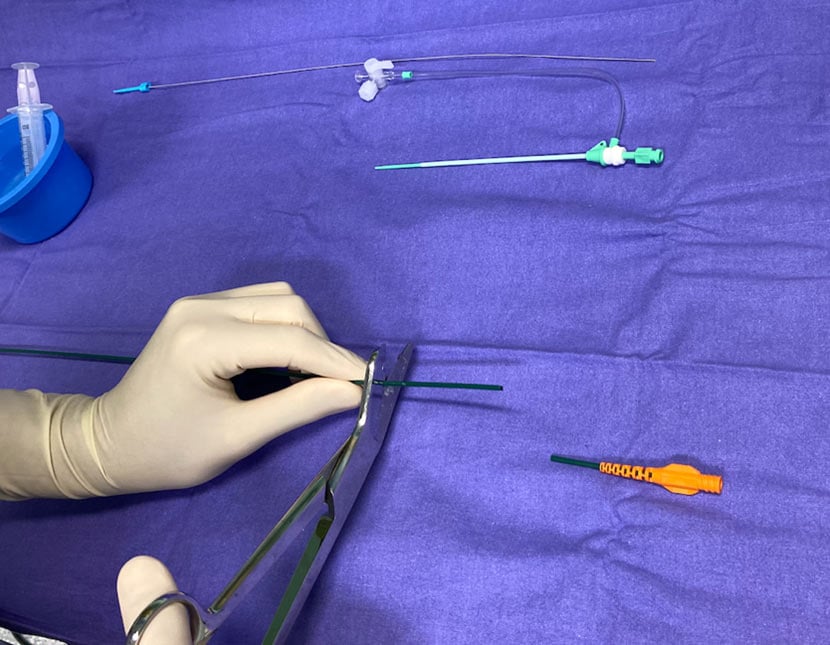
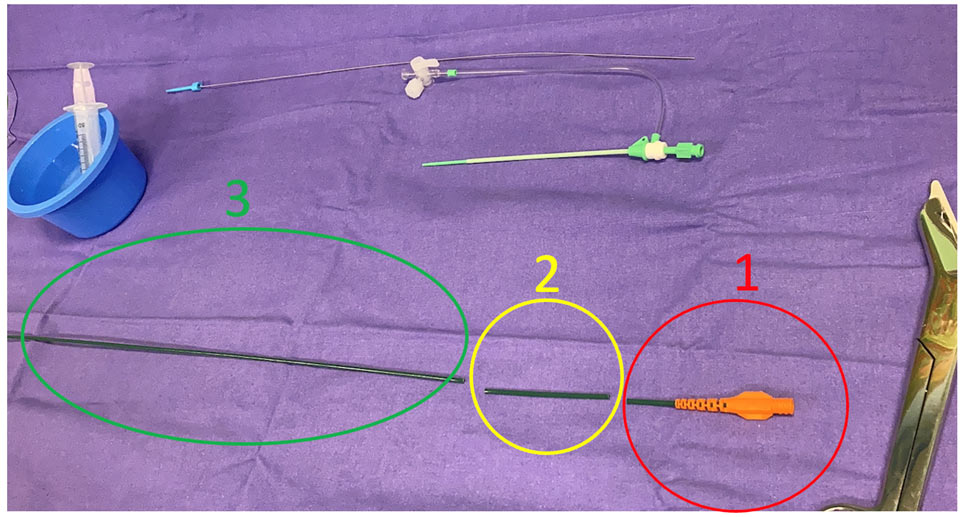
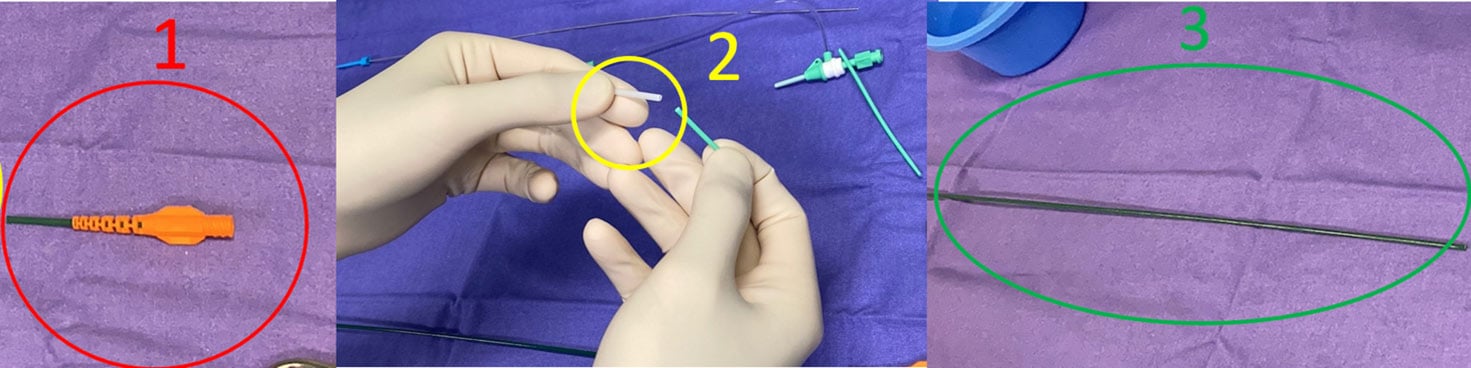
Step 3
After the shortening of the GC, you have three pieces of it: 1) proximal part of the GC; 2) the length by which you would like to shorten the catheter; 3) the distal part of the GC.
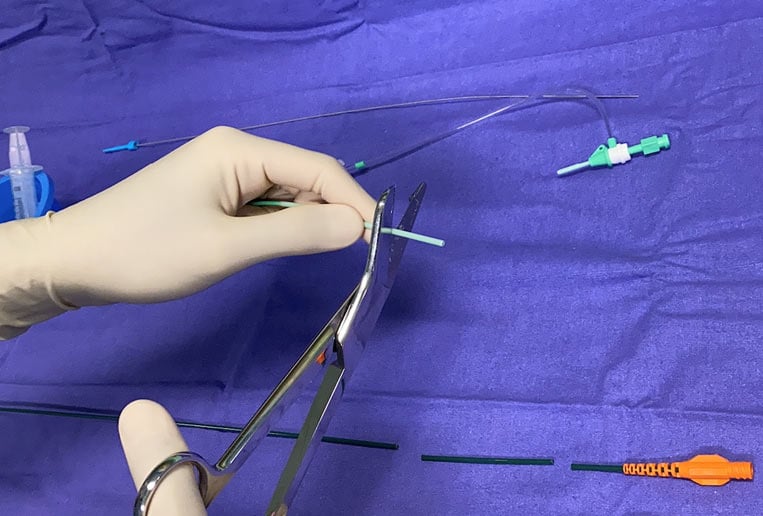
Step 4
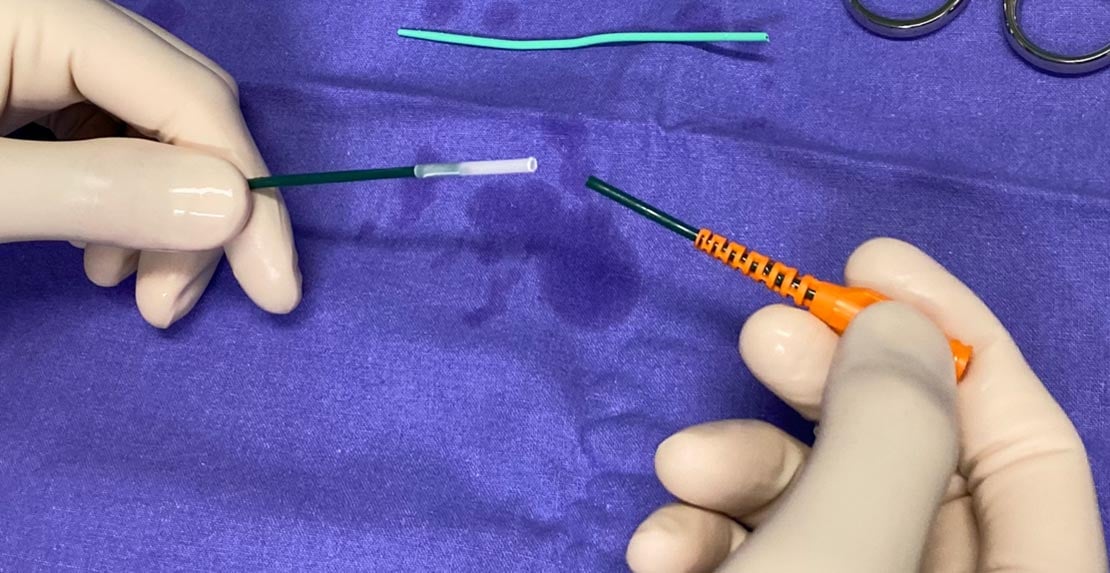
Take the introducer assembled (inner sheath inside the outer sheath tube) of 1 French smaller than the GC, and cut it using the sterile scissors at 2 cm after the proximal segment (4.1) and again 3 cm distally after the first cutting.
Step 5
So, you have three segments to build the new GC (Figure below):
- Proximal cut part of the GC
- Connector: outer sheath tube segment
- Distal cut part of the GC
Using the rigid inner sheath of the introducer like a stick applying a light circular movement on the outer sheath tube segment (Video 1 and Figure below), and repeating this for both sides of the cut outer sheath tube segment, we create a small flaring at both entries.
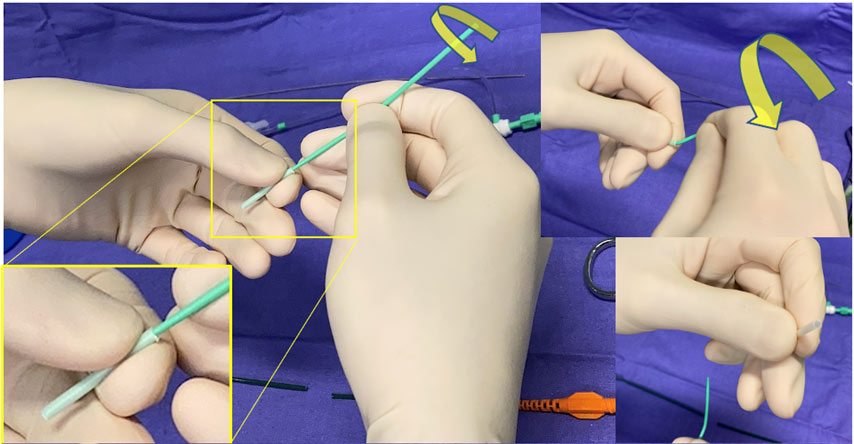
This slightly double flared segment (red line form exemplification) is the connector of the two parts of the GC (Figure below).

Step 6
It’s time to assemble the modified shorter GC. Charging the cut outer sheath tube segment (connector) on the inner sheath, you have the needed support to advance it on the distal GC part (Video 2). Then, once you have the connector placed on the distal part of the GC (image below), you can fix the proximal cut part of the GC in the connector (Video 3). Remember to wash/flash every component during the assembly.
Step 7
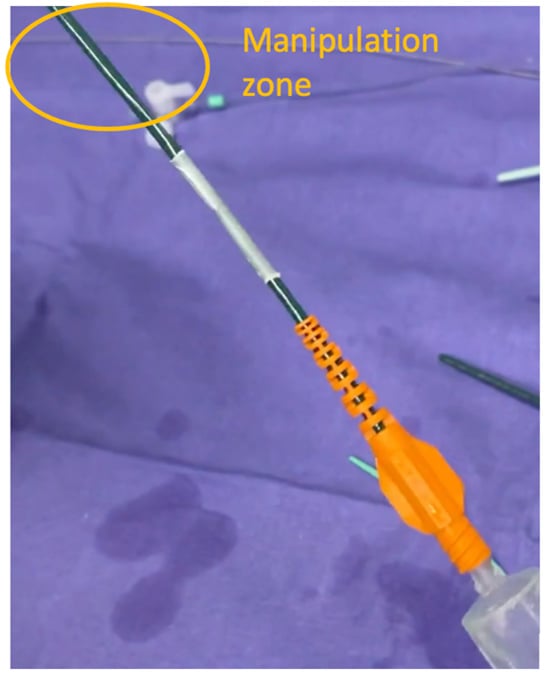
You have now the new shorter GC (image below), as you can see it performs well during a flash with water (Video 4). Remember to manipulate it distally or, even better, at the level of the connection you created.
Points of specific attention
- Using this technique, you can achieve the length of the guiding catheter you need for the best device compatibility in your procedure.
- Remember to realize the needed length reduction before the cut and to wash properly the devices involved in the assembly.
- Remember to manipulate the newly created guiding catheter very gently, avoiding excessive rotations at the level of the connection, which can carry the risk of disconnection of the system.
A word from the reviewer - Pierre Deharo
Very nice "home-made" technique for shortening catheters - may sort you out of difficult times - needs to be tried first in your lab before practising - congrats for these tips and tricks.

Authors


No comments yet!